Core Elements
Core elements are channel independent. These elements are present in the Chatbot receives and Chatbot actions sections in the chatbot editor.
To view elements that are specific to a channel, refer to the Channel elements section.
API
Use the API element to retrieve information from external systems and send information to these systems through your chatbot.
The element contains request and response parameters.
Request
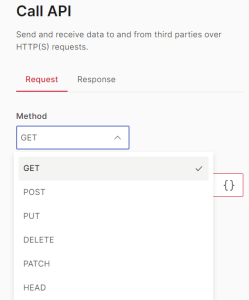
Go to the Request tab and complete the following fields.
Method
Choose one of the following API methods.
- Get
- Post
- Put
- Delete
- Patch
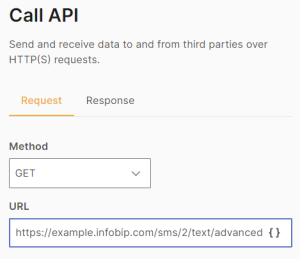
URL
Enter the base URL of your external system, along with the required endpoint. You can include placeholders.
The following is an example of a base URL. Do not use it in your code.
https://example.infobip.com/sms/2/text/advanced
where https://example.infobip.com is the base URL used in the send SMS endpoint.
Enable escaping of URL parameters
Select this field if your base URL contains attributes that have one or more of the following:
- Non-ASCII characters
- Reserved characters
- Characters that are unsafe by web standards
Selecting this field replaces these characters.
Example: The base URL has parameters that return an empty space. Enabling the escape option escapes that character and returns a valid URL.
Include certificate in API request
TLS certificates are standard certificates used by web browsers to ensure a safer internet experience. End users are likely to trust websites that are secured by TLS certificates because they encrypt the communication between the web applications and servers, such as web browsers that load a website.
To include a TLS certificate in the API request, you first need to set up the certificate. To do so, contact the Infobip Support team.
After you set up the certificate, select Include certificate in API request, to include it in the API request.
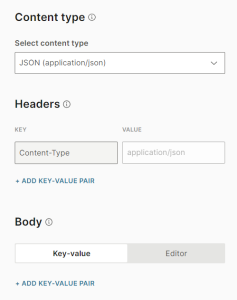
Content type
Specify the type of content for the request header. Example: Choose JSON to indicate that the request data is sent in JSON format.
Depending on the content type that you choose, the header and body are as follows:
| Content-type | Description | Header | Body |
|---|---|---|---|
| None | Select if your API has only a header and does not have a body. |
No predefined key-value pair. Option to create key-value pairs. |
N/A |
| Raw |
Use for unstructured requests. Example: Requests that contain only numbers or blocks of texts. Also, use for custom content types that are not available on the predefined list. Example: text/xml. For custom content-type header, manually enter the required content-type header. |
No predefined key-value pair. Option to create key-value pairs. |
Editor |
| JSON | application/json: Select for most REST API calls. |
Predefined key-value pair. (Content-Type, application/json) Option to create key-value pairs. |
Key-value pair Editor |
| Text | text/plain: The content is in a human-readable format. |
Predefined key-value pair.(Content-Type, application/json) Option to create key-value pairs. |
Editor |
| XML | application/xml: The content format is intended for computers. |
Predefined key-value pair.(Content-Type, application/json) Option to create key-value pairs. |
Editor |
| URL-encoded | application/x-www-form-urlencoded |
Predefined key-value pair.(Content-Type, application/json) Option to create key-value pairs. |
Key-value pair |
| Form Data |
multipart/form-data: Use when sending binary (non-alphanumeric) data or a large sized payload |
Predefined key-value pair.(Content-Type, application/json) Option to create key-value pairs. |
Key-value pair |
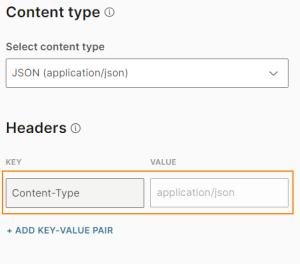
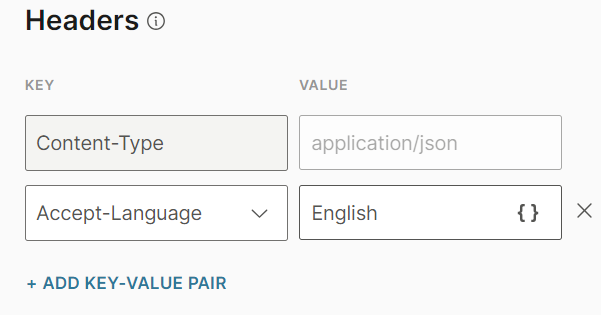
Headers (Optional)
Use the request header to provide information about the request so that the server can customize the response. Example: Use the Accept-Encoding header to specify the required encoding for the response.
This metadata is specified in key-value pairs of parameters and is sent along with the request. For some content types, the key-value pair has a predefined value that specifies the type.
If you need additional values in your header, do the following:
- Click Add key-value pair.
- In the Key field, select the required criterion from the list. Example: Accept-language.
- In the Value field, enter the value. You can also add an attribute that contains the value.
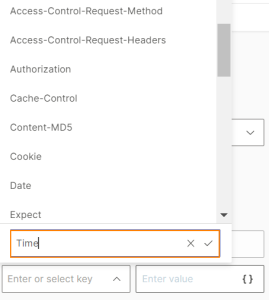
If a key-value pair is not in the list, do the following to add the values that you need for your API call.
- Click Add key-value pair.
- In the Key field, select Enter custom.
- Enter the name of the key.
- Click the checkmark.
- In the Value field, enter the value. You can also add an attribute that contains the value.
Note
You cannot add multiple key-value pairs that have the same key. Example: You cannot add two key-value pairs that have the Accept-language key.
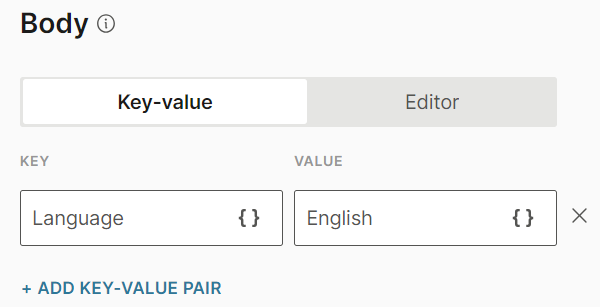
Body (Optional)
Specify the body of the API call. Depending on the content type, you can use a Key-value pair and/or the Editor.
Key-value pair: To add a key-value pair, do the following:
- Click Add key-value pair.
- In the Key field, enter the required criterion. Example: Language. You can also add an attribute that contains the key.
- In the Value field, enter the value. You can also add an attribute that contains the value.
Note
You cannot add multiple key-value pairs that have the same key. Example: You cannot add two key-value pairs that have the Language key.
Editor: Specify the text to include as the body of your request.
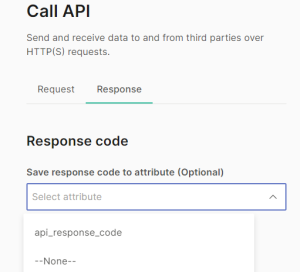
Response
Responses to API calls are saved in attributes.
For information about saving any XML files that you receive, refer to the how to section.
To save the response that you expect to receive, go to the Response tab, and complete the following fields.
Save response code to attribute (Optional)
To save response types to your APIs, do the following:
- Create an attribute.
- Select the attribute from the Save response code to attribute list.
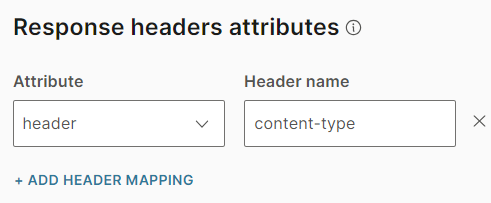
Response headers attributes
To save the response header to an attribute, do the following:
- Create one or more attributes to save the response header.
- Select Add attribute.
- In the Attribute field, select the attributes from the list.
- In the Header name field, enter the name of the header. This field is not case sensitive.
Response body attributes
When you expect values in the return body of your API call and want to save them, do the following:
- Create one or more attributes to save the response body.
- Select Add attribute.
- In the Attribute field, select the attributes from the list.
- In the Path field, enter the path to the attribute. The path is the location in the JSON file hierarchy where the value of that attribute is located. Depending on the level where the attribute is located, include all the previous levels separated by a dot “.” in the attribute path.
Timeout
Specify how long you want to wait for the response. The minimum value is 1 second and the maximum value is 60 seconds. The default value is 10 seconds.
SOAP API calls
SOAP API calls can be sent only in XML format. There can be only one root element, which acts as the envelope, in the file.
Most SOAP APIs use Web Service Definition Language (WSDL). WSDL defines the structure of the xml. Example: Whether an element or attribute can appear multiple times, whether it is required or optional, and the order of the elements. If the service with which you are interfacing has a WSDL, it will be easier to connect with it.
SOAP calls accept the values of text, xml, and xml list. Choose the format depending on how you want to use the values later in the Code element. Example: Whether there are xml tags that you want to extract from the response you receive.
Request
You can write XML for SOAP API calls in the following ways:
| Content type | Header | When to use |
|---|---|---|
| Raw | Key: Content-Type Value: text/xml |
If end user can read the source xml document |
| XML | Predefined header (Key: Content-Type, Value: application/xml) | All other cases |
Response
SOAP response xml follows the same logic as the incoming request. In case of an error, the xml contains the message details.
SOAP versus REST API
Consider using REST communication protocol for the following reasons.
- SOAP APIs are slower and more complex than REST APIs.
- SOAP APIs can handle only XML files.
- SOAP APIs do not cache information.
Attribute
Use attributes to capture and store information against the attributes you have added in the Attributes tab by providing a request and allowing the user to respond.
The response is stored against the attribute and can be used, quoted, and can act as part of the chatbot's logic down the line in the customer journey.
The attribute element works in the same way you would send a generic text element, but you will additionally need to define which attribute to store responses against.
You will already have to have your attributes created in the Attributes tab to be able to use this element. Or you can use the quick-create option directly in the chatbot editor to add attributes. Existing attribute types are non-configurable here.
Use the skip option if your chatbot is using NER attributes and the attribute already has a prepopulated value. This'll be because the customer would have already mentioned the relevant information earlier on, and your NER-enabled chatbot will have captured it.
If you are using the Attribute element after a button element or reply or quick reply, make sure to leave the text field in Attribute empty as the postback value defined previously will be used as the user response to be saved to the attribute.
Link previews are used to display a preview in the chat for channels which support this function.
The validation regex pattern allows you to enter your own regex pattern for attribute value validation. The validation based on regex supports BRE (Basic Regular Expressions) standard. Regex is useful in situations where you want to check, match, or validate different inputs, like check if a string contains numbers, or validate if the input is a phone number.
The Repeat option lets you set how many times a user can provide an unrecognized response or action before the fallback option is triggered. Set the number of times they can repeat an attempted response.
Fallback is used in cases where the user is provided an unknown response or action. Set whether to send them to another dialog if this happens, or whether to transfer them to an agent, as well as an optional message if required.
Authentication
The Authentication element is only available for the Authentication dialog and is used to trigger authentication at the end of authenticated dialog flows.
Set up a secured chatbot using authentication
Close Session
Use this element to terminate the entire session. This element is not configurable and only works y ending the chat with the end user when they reach this stage of the conversation.
If the user continues to talk with a chatbot that has closed the session, the chatbot will treat it as a new session and will start afresh.
It requires no configuration – but bear in mind that when you add it to the dialog, the element will finish the conversation between the end user and the chatbot. In case the user wants to continue talking with the bot, they will have to start the conversation from the beginning.
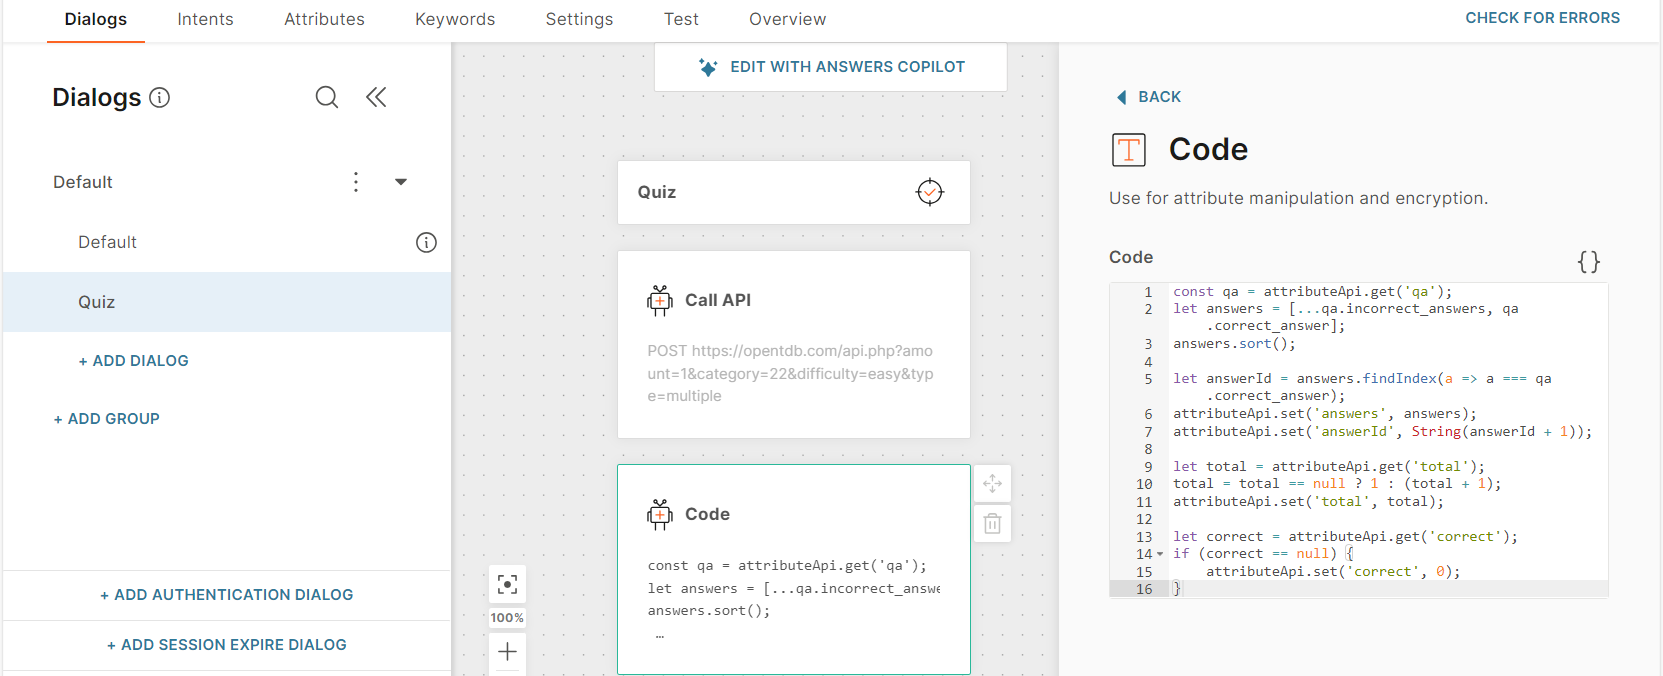
Code
Coding element gives you more flexibility when designing a dialog and what you can do with attribute values, and also provides encryption capabilities.
Currently, two classes are available:
- attributeAPI which enables you to work with the attributes in the platform using the following functions:
- GET
- SET
- encryptionUtils which currently supports the following hash functions:
- MD5
- SHA-1
- SHA-256
- SHA-512
Note
Use JavaScript when writing the code.
You can use the element for the following:
- randomization of available information
const items = [1, 2, 3, 4, 5];
const item = items[Math.floor(Math.random() * items.length)];
attributeApi.set('random', item);
- Usage of counters (can be followed by the Conditions element to branch the results)
let correct = attributeApi.get('correct');
correct = correct == null ? 1 : (correct + 1);
attributeApi.set('correct', correct);
- Transfer of large json files into variables (for easier manipulation of attributes)
const qa = attributeApi.get('qa');
let answers = [...qa.incorrect_answers, qa.correct_answer];
answers.sort();
const answerId = answers.findIndex(a => a === qa.correct_answer);
attributeApi.set('answers', answers);
attributeApi.set('answerId', String(answerId + 1));
- Secure hashing of attributes
const encryptedMd5 = encryptionUtils.md5('test');
const encryptedSha1 = encryptionUtils.sha1('test');
const encryptedSha256 = encryptionUtils.sha256('test');
const encryptedSha512 = encryptionUtils.sha512('test');
The Answers platform compiles and validates whether the code syntax is correct (will not display where the error occurs). The validation happens at the moment you activate the bot and an error will occur in case validation fails.
const encryptedMd5 = encryptionUtils.md5('test');
const encryptedSha1 = encryptionUtils.sha1('test');
const encryptedSha256 = encryptionUtils.sha256('test');
const encryptedSha512 = encryptionUtils.sha512('test');
const qa = attributeApi.get('qa');
let answers = [...qa.incorrect_answers, qa.correct_answer];
answers.sort();
const answerId = answers.findIndex(a => a === qa.correct_answer);
attributeApi.set('answers', answers);
attributeApi.set('answerId', String(answerId + 1));const encryptedMd5 = encryptionUtils.md5('test');
const encryptedSha1 = encryptionUtils.sha1('test');
const encryptedSha256 = encryptionUtils.sha256('test');
const encryptedSha512 = encryptionUtils.sha512('test');
Note
If you want to see examples of coding for some chatbot use cases, check the Code in Coding element.
Conditions
Use conditions to set up branching logic depending on the attribute values received back from users. This allows your chatbot to proceed down different routes once they get the information they need.
Drag the conditions element into the chat journey after a point where you are expecting to receive a response and add as many conditions as required based on the possible inputs.
Start by selecting an attribute in a condition, then select an operator to work with (matching, containing, not containing, not matching, null). Available operators change depending on the attribute type (e.g. if an attribute is a boolean, only 'is' and 'is not' is selectable).
Then provide the match data in the value field to run the condition against. Null operators do not require any match data.
When you have added all of your required conditions, you can then continue to build the customer journey by dragging the relevant channel elements under each condition in the editor.
Conditions always display an Else route for cases when conditions can be matched against anything. Use this route to tell the chatbot what to do in this case (to another dialog, send a message, etc.)
You can only have one condition per dialog, and conditions can only have up to two elements per branch.
If you don’t add the To dialog element, the NLP engine will take care of the conversation by resolving the intent and selecting the appropriate dialog to continue the conversation for intent-driven chatbots.
CSAT survey
Customer Satisfaction surveys are added at the end of dialogs when the conversation is coming to a close. They are used to gather important feedback from the customer about the level of service they received through the chatbot, thus acting as a powerful tool for optimization.
CSAT surveys are usually made up of a numeric score, text, and a feedback question. Scores are always required and can be in the following configurations: 1-2, 1-5, or 1-10. Use the text field as required to as whatever information you want, or to explain the scoring logic.
Set a feedback question to let customers respond with a personal note. Use fallback messages to tell customers their inputs are not recognized.
Answers will assume the following logic based on CSAT scores:
- 1 - 2 scale: 1 = negative | 2 = affirmative
- 1 - 5 scale: 1 to 3 = unsatisfied | 4 to 5 = satisfied
- 1 - 10 scale: 1 to 6 = unsatisfied | 7 to 10 = satisfied
Custom Event
Use the Custom Event element to pass an event from Answers to People. You can then use this information when the end user interacts with your chatbot again or use it in other Infobip solutions.
To configure this element, do the following:
- Drag and drop the Custom Event element from Chatbot actions.
- Find the Person profile in which you want to save the event. Do the following:
- In the Contact information attribute field, enter the Answers attribute that contains customer contact information. Example: customerContact.
- In the Contact information attribute type field, choose the identifier of the Person profile. Example: If you want to use the end user's phone number to identify their Person profile, use the attribute type Phone number.
Answers supports the following field values when matching an Answers attribute against the Contact information attribute type field: Phone Number, Email, Internal ID, or External ID. If you want to use a different identifier in People to associate the custom event, first use the People element to get one of the supported properties from the Person profile. The People element supports retrieval from the other ID formats.

- In the Custom event configuration section, specify the event that will be saved against the Person profile.
- Click Add custom event.

- Choose the relevant custom event from People.
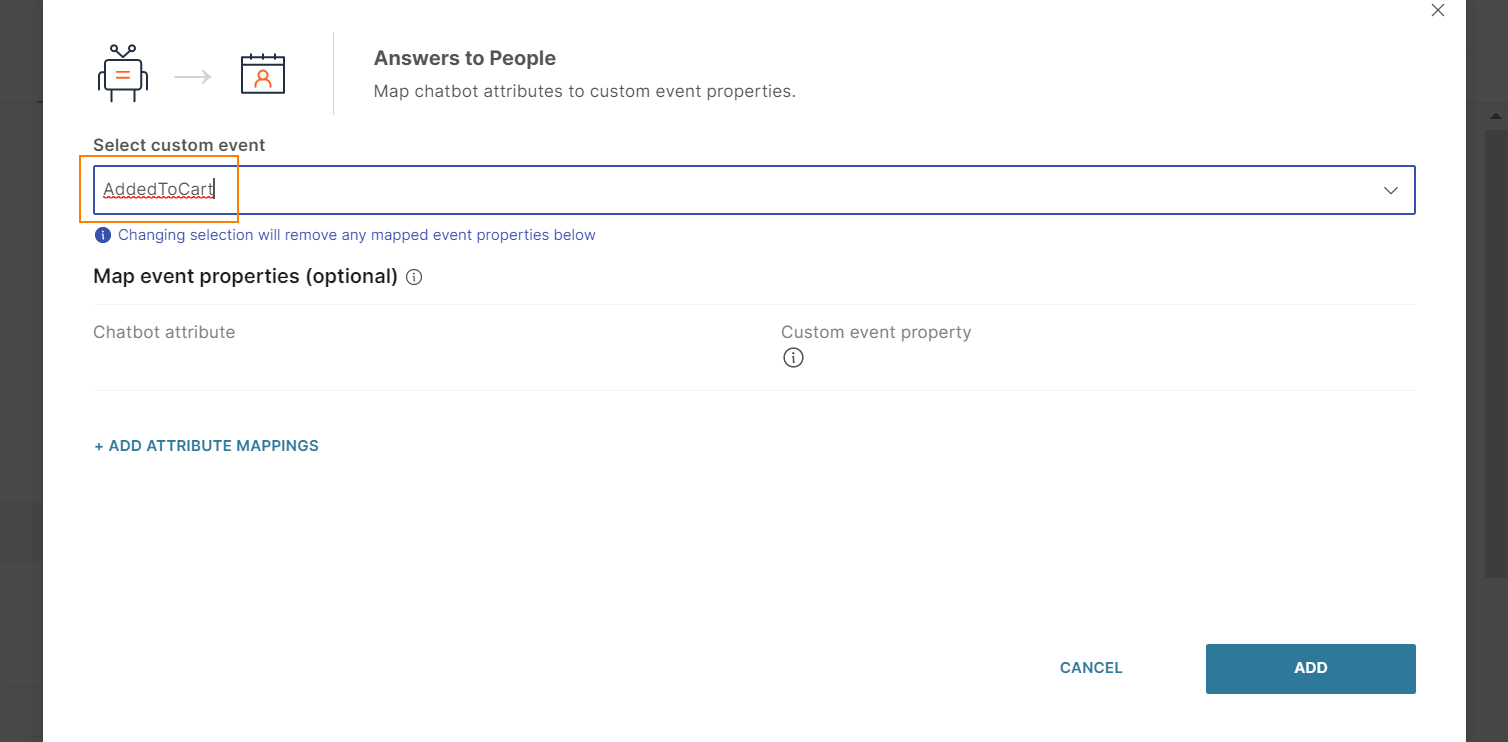
- Click Add custom event.
- (Optional) Add properties to the event.
- Click Add attribute mappings.
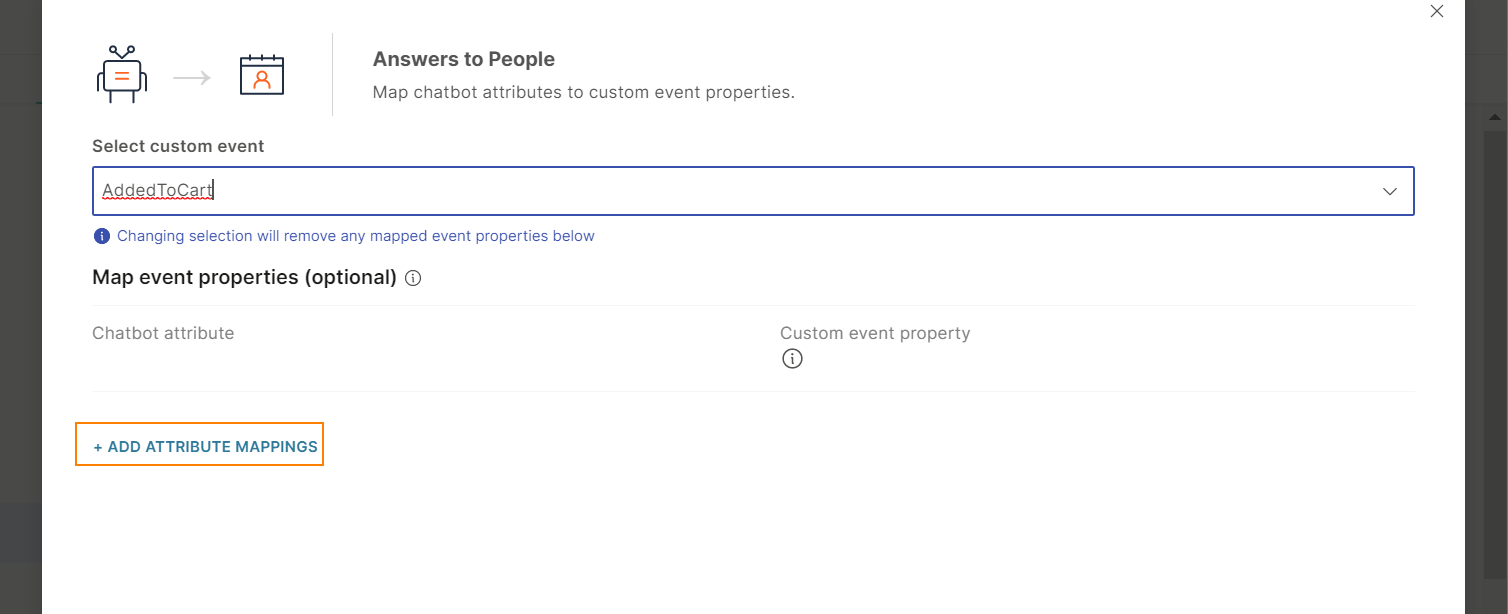
- Choose one or more Answers attributes that contains the event properties. Example: addedCart, productID, productName, and productPrice.

- For each Answers attribute, choose an equivalent People event property. Example: addedCart, productID, productName, and productPrice. Make sure that the Answers attribute type and People event property are compatible.
Answers does not support dateTime property. If you want to pass a dateTime value into an event, save the value in a Text attribute in Answers and map the attribute to a Text property type.
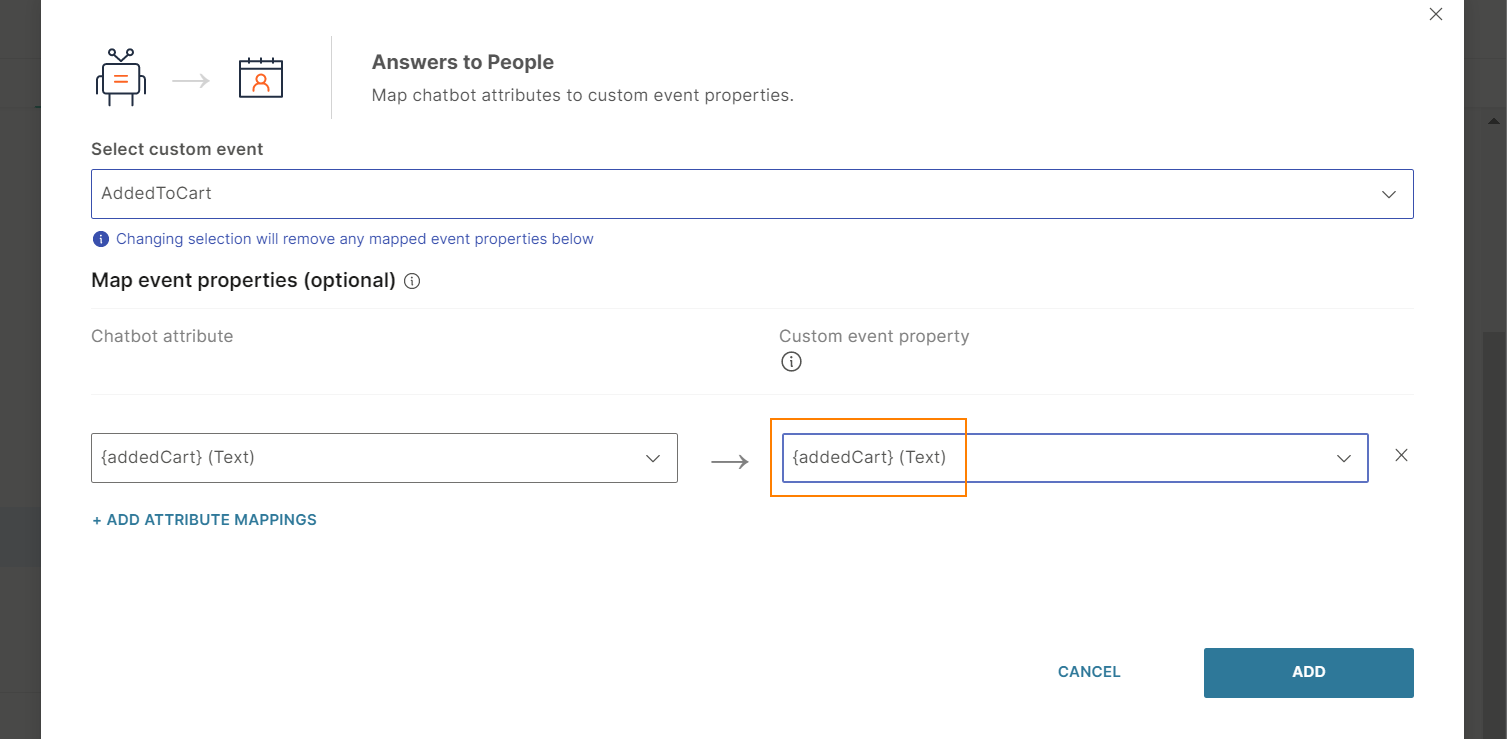
- Click Add.
- Click Add attribute mappings.
The event, along with its properties, is saved in the end user's Person profile in People.
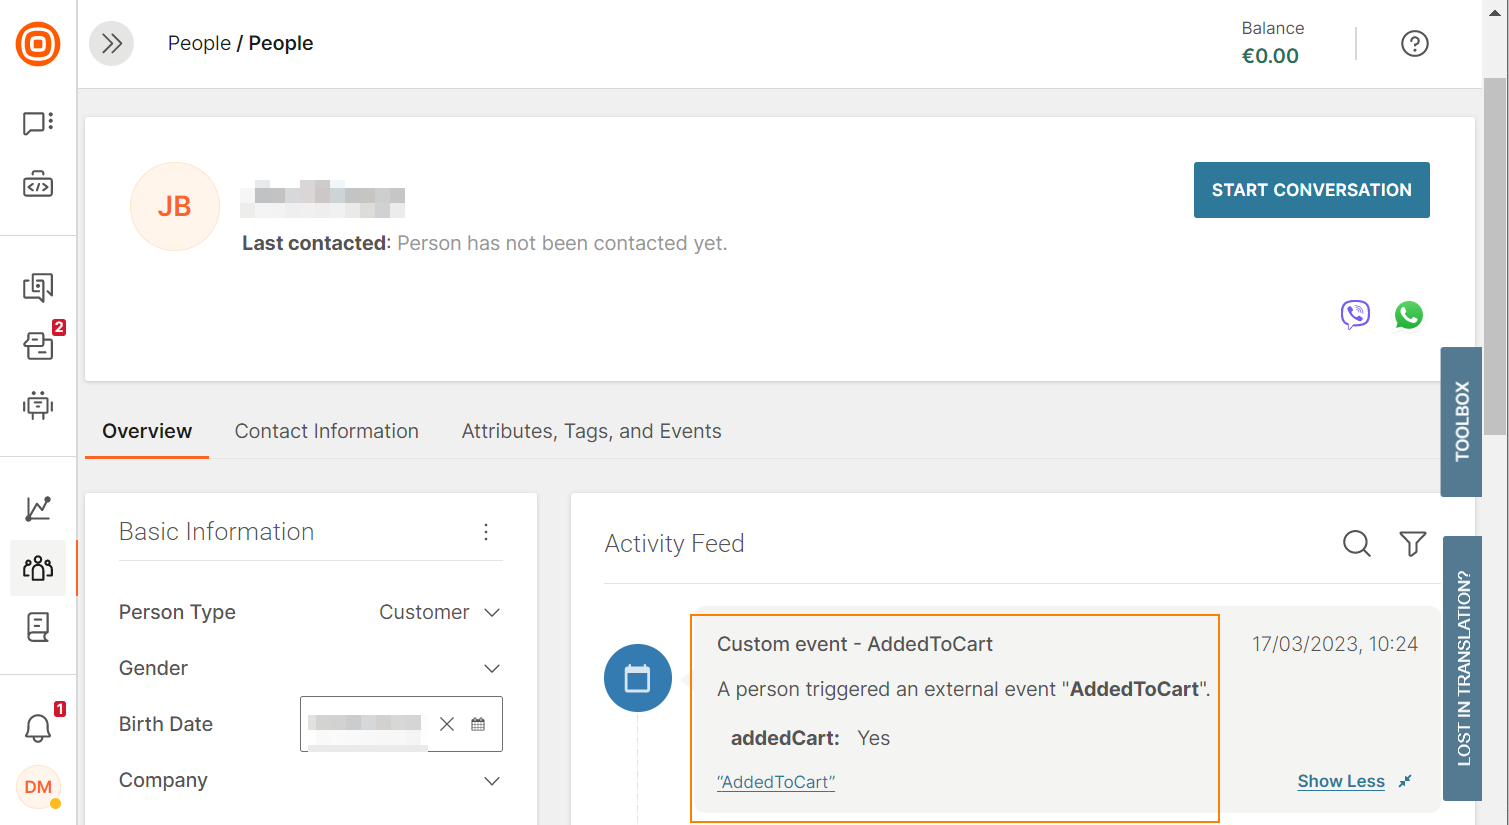
For more information about using the Custom Event element in your chatbot, refer to the Custom Events in People documentation.
Delay
Use the delay element to add as long or as short pauses as desired to mimic the natural tempo of talking to a human. Delay simply adds a pause between elements.
Insert the delay between any elements where it would fit in a normal conversation, and set the delay time in seconds.
People
Connect to the Infobip People solution which allows your chatbots to go and find the required data on your customers, using the existing information you have stored against their profiles. This information can be used in customer journeys and updated along the way by updating people profiles.
By connecting to People you can also update and create new customer profiles when a profile is not found. This allows you to capture and store information effortlessly.
Add the People element to a dialog and select an action of what you need the system to do at this stage. You can either select to go and find information or to create/update a profile depending on the scenario.
Set up a chatbot integrated with People
To Agent
When there are complex questions or requests that the chatbot cannot manage, use the To Agent element to transfer the chat to a human agent.
Example: The chatbot is not designed or trained to answer a specific question, or the chatbot cannot understand the end user's message.
You must have one of the following enabled to use this element.
- Infobip Conversations solution
- Infobip Conversations API solution to integrate with an external contact center solution.
When you redirect to an agent, the agent takes over the chat. Chats cannot be sent back to the chatbot.
Tags
Add tags to the conversation to route the support request or chat to the right queue in Conversations and external contact center solutions.
Example: If you add the tag account_management, the request is routed to the account_management queue in Conversations.
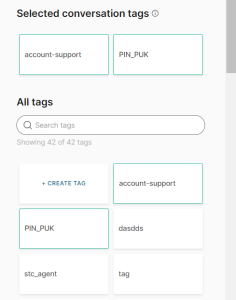
Create a tag
- In the All tags section, click Create tag.
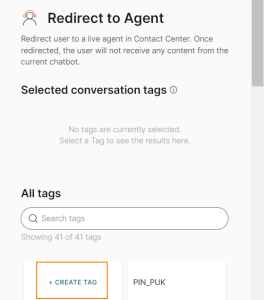
- Type the name of the tag.
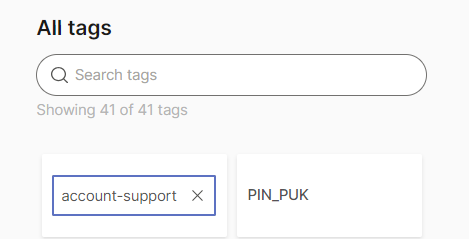
Add a tag to the conversation
In the All tags section, select one or more tags to add to the conversation. The selected tags are displayed in the Selected conversation tags section.
To Dialog
Use this element when you are ready to send the user on to another dialog when they reach this point in the conversation. It can be to a dialog with an intent to finish the conversation, or it can simply be a transition to a new dialog based on a different intent where the end user is asking for new information.
For intent-driven chatbots, you can select which attributes to be transferred over to other dialogs. Use the share attribute option to enable the attribute selector.
You can add as many attributes as you have set up already, but make sure to take into consideration those which are used in the intent and have values that can be transferred. Once selected, the attribute is no longer selectable.
User input
User inputs are used by taking the value of the response by users and applying further logic to the chatbot. There are a few ways you can set up the user input logic:
- Keyword recognition
- Natural language processing
- Repeats and fallbacks
You need to have your keywords already added and set up in the Keywords tab. You chatbot will recognize keyword inputs from users matched with your configured keywords. This allows you to route the dialog on to the next step depending on what the user responds with.
Use the +Add option to add a new keyword to the user input element, and select from the dropdown list from your existing keywords.
In addition to using keywords mapping to direct the conversation, you can also enable the NLP engine to process input in case the correct keyword or keyword synonym is not entered.
You can learn more about how NLP engine processes data under Advanced Options - NLP.
Chatbots always need to have logic set up in cases where they don't know how to handle a request on response. The first option is to ask the user to try answering again before moving them on to a fallback option. Configure the repeat settings to determine how many times they can try answering again, along with any text to go with it.
Link previews are used to display a preview in the chat for channels which support this function.
Lastly, configure the fallback option so the chatbot knows what to do in cases where user input has not been successful. Using fallbacks you can route users to another dialog, or offer them to connect to a human if you have a support center.
Webhook
Webhooks are user-defined HTTP callbacks in a webpage which are triggered depending on a specific and defined event, for example when a user is required to provide authorization criteria. They are generally used for real-time notifications and data synchronization.
When triggers occur, webhooks register events, collect the required data, and send it back to your specified URL in your HTTP request. Using the example above, the trigger event would be requiring the user to provide authorization criteria, and where you want that information to be sent.
In Answers, webhooks usually follow the API element whereby you would use the API element to send the webhook URL to an external system. Once the requested data or criteria become available, the webhook destination URL sends the request back. The webhook then saves the response and saves it to a defined attribute.
Start by defining the webhook URL type to use the sessionID as a parameter or to use it in the body of the request. The Webhook URL is predefined and should not be changed, depending on the webhook URL type, it will update itself
Set the Method to either POST or GET then define the Attribute(s) where the values will be saved.If you use Body parameter sessionID you can only use it with the POST method, and you need to define the sessionID body parameter name that will be automatically added to the Webhook URL.
If you are using the POST method, you can select an attribute from the Attribute dropdown list, and in this case, what you need to define is the path to the parameter where that value is saved.
The path is the location in the JSON file hierarchy where the value of that attribute is located, levels are defined by the number of entries separated by a dot “.”.
Maximum throughput per endpoint is 100 requests per second. Maximum throughput per endpoint per IP is 50 requests per second.
If using the GET method, and you want to save the value to an attribute, select the attribute from the Attributes dropdown list and define the Query parameter which contains the required value.
Webhook request codes:
- 200 - Successful
- 40401 - Unsuccessful. No session
- 40026 - Unsuccessful. Session cannot handle request
Example: Webhook element used in conjunction with API element
You need to authorize your end user with an external authorization service, so you use API element to send an authorization request towards the service which contains the webhook URL and you wait for the response
Answers receives the response with the URL for the user authorization and you store that URL in an attribute in Answers (attribute is defined in the API element)
The next step is to ask the user to authorize themselves through the URL you received from the external authorization service. You can use the Text element to send the authorization link to the user
After the user authorizes themselves, the webhook receives a request from the external authorization service with a token that the user is authorized, and that token is also stored in an attribute (for further authorization needs if necessary)
For the receipt of the user authorization and for saving the token, you use the Webhook element where you have defined the method and the attribute where the token value is going to be saved