People
Connect to the Infobip customer data platform, People, to retrieve and update information about end users. In People, this information is stored in Person profiles.
You can do the following:
- When end users interact with your chatbot, you can capture relevant information from the conversations and store this information in the Person profiles.
- You can retrieve information about end users from their Person profiles.
People is enabled by default when you enable Answers.
The People features that are available in Answers depends on your Answers plan.
| Free Trial | Start | Grow | Scale | |
| Basic functionalities of People, such as profiles, file upload, tags, segments, and custom fields | Supported | Supported | Supported | Supported |
| Advanced functionalities of People, such as custom events, profile scoring, and calculated fields | Supported | Unsupported | Supported | Supported |
Attributes
Use attributes to add or retrieve information about end users from People. Use this information to personalize your responses to end users.
The attribute types are as follows:
- Standard: Information in standard fields. Example: Contact information
- Custom: Customized information that is not available as a standard field. Example: End date for a subscription
- Computed: Information obtained through custom formulae, profile scoring, and event aggregation. Use these attributes to do the following:
- Customize your messages to end users. Example: If the end user has purchased a product in the last 7 days, you can ask them "Are you contacting us regarding your recent order?"
- If the end user's profile score is high, you can prioritize their requests
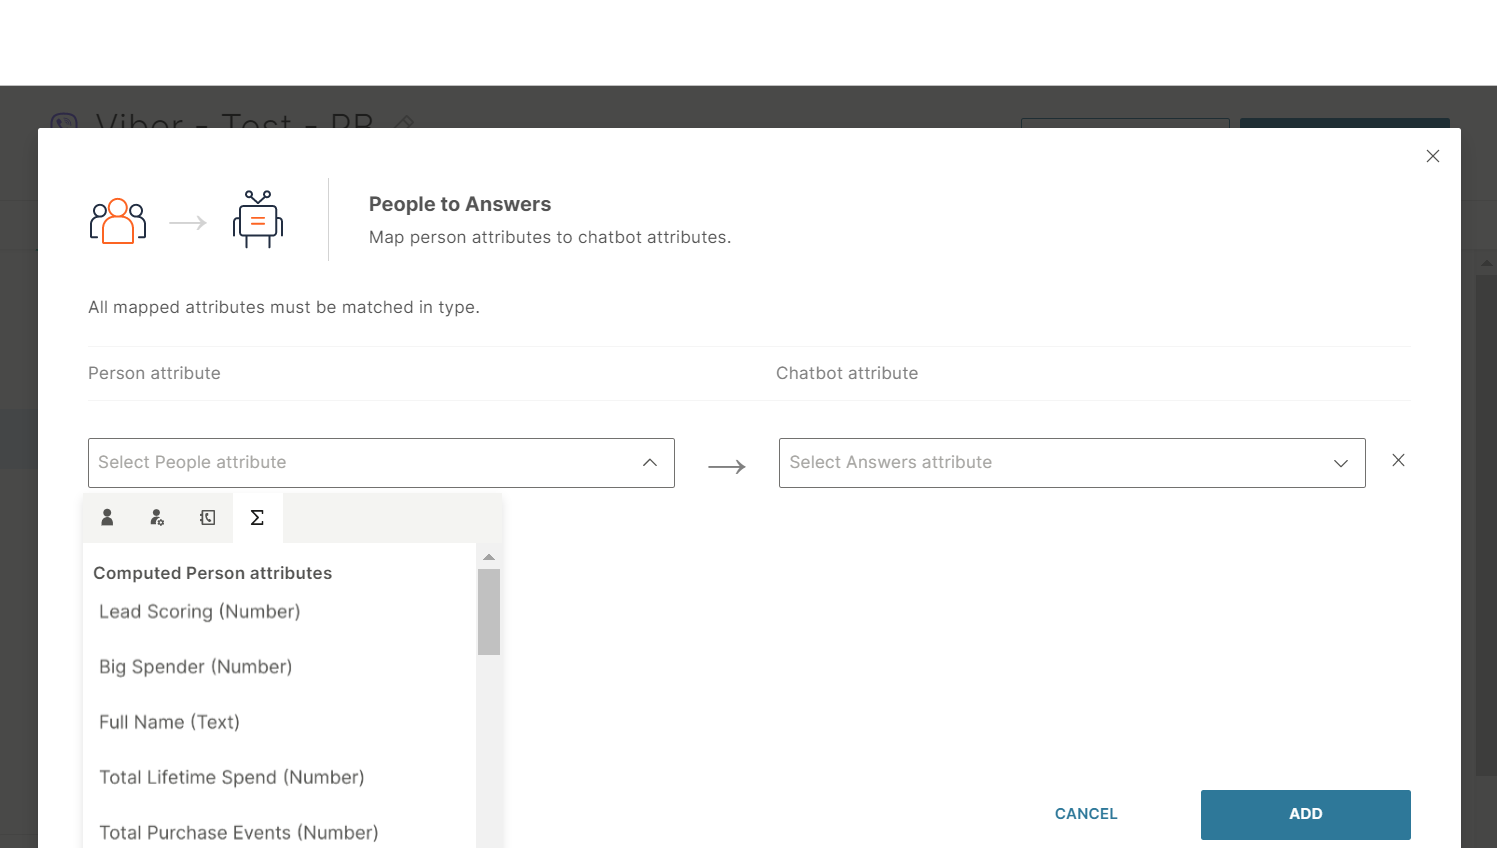
Attribute Mapping
Use custom mapping to map an attribute in Answers with an attribute in People. Example: In Answers, you can store the location of the end user in the Location_City attribute and map it to the City attribute in People.
Make sure that the attribute type in Answers is compatible with that in People. Example: If the attribute type in Answers is Boolean, you cannot map it with a Text attribute in People.
When you use the Get information action (People to Answers), you can map attributes as follows:
| Attribute type in People | Attribute type in Answers |
|---|---|
|
Text Gender |
Text |
|
Decimal number Whole number |
Number |
| True/False | Boolean |
|
Date Date Time |
Date |
| List of objects | List |
When you use the Create or update person profile action (Answers to People), you can map attributes as follows:
| Attribute type in Answers | Attribute type in People |
|---|---|
|
Text Phone number Location URL |
Text |
|
NER MO |
Text |
| Boolean | True/False |
| List | List of objects |
Custom Events
When an end user interacts with your chatbot and performs an action, you can pass this event to People. The event is saved as a custom event in People. You can then use this information when the end user interacts with your chatbot again or use it in other Infobip solutions.
Example: An end user purchases a product during a session with your chatbot. Save this event as a custom event in People. You can then do the following:
- Use the event as context in Answers and Conversations: The end user contacts your business again after 3 days. The chatbot or agent can mention the purchase in the initial message. "How can I help? Are you contacting us regarding your recent purchase?"
- Follow up with the end user through a Flow campaign in Moments: "Based on your recent purchase, here are some products that you may like."
- Use the event properties to populate computed attributes in People. You can use computed attributes for use cases such as populating total lifetime spend, average spend, most common request, and last answers dialog. You can then use these attributes to personalize your communication in Answers or to improve segmentation in Moments.
- Mark the Person profile as high priority: The next time the end user contacts the your business, you can prioritize them.
Process
The process is as follows:
- In Answers, an end user performs an action, such as saving a product to the cart.
- Save each relevant property of this event in Answers attributes. Example: successful addition of a product to cart; and identifier, name and price of the product.
- Pass these attributes to People, where you can save them in a custom event in the end user's Person profile.
Follow the instructions in each section.
Create a Custom Event in People
- Log on to the Infobip web interface.
- Go to People > Events > Custom Events.
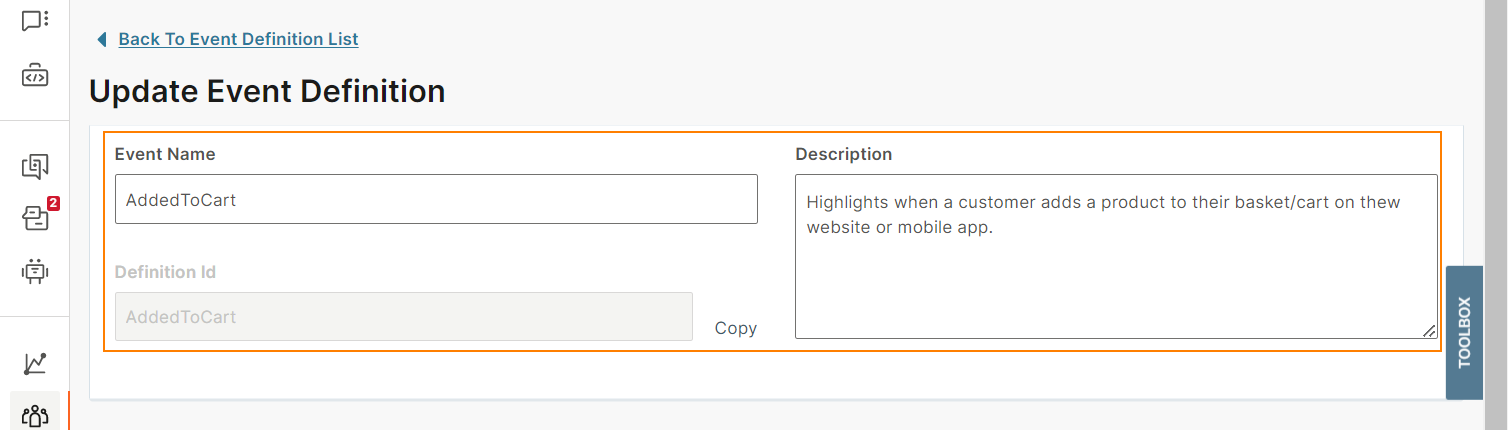
- Click New event definition.
- Add the Event Name and Description. Example: To save the event of an end user adding a product to cart, create the event, AddedToCart.
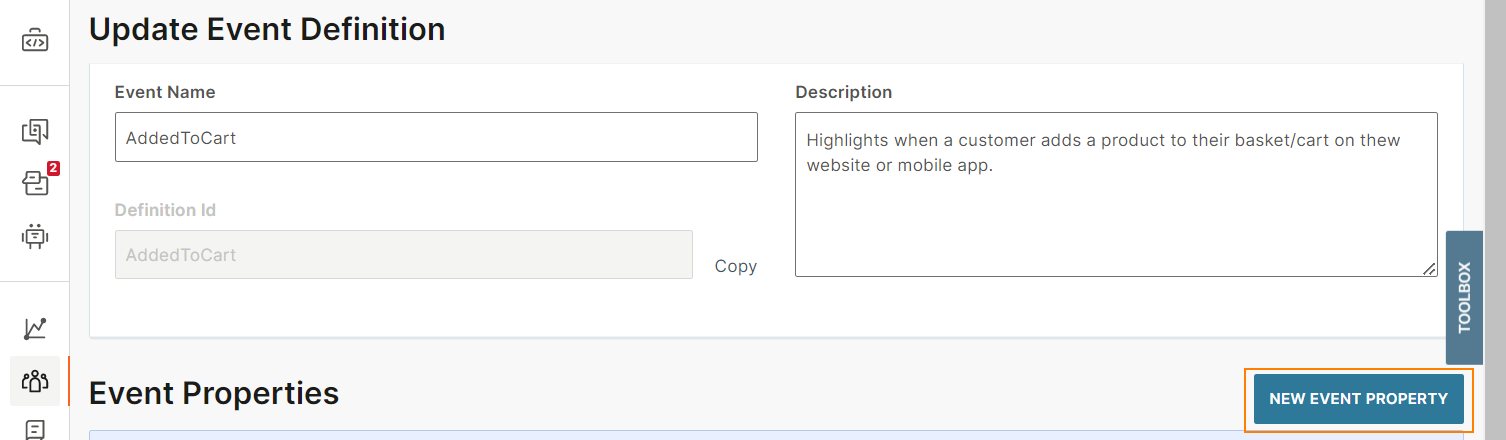
- Click New event property.
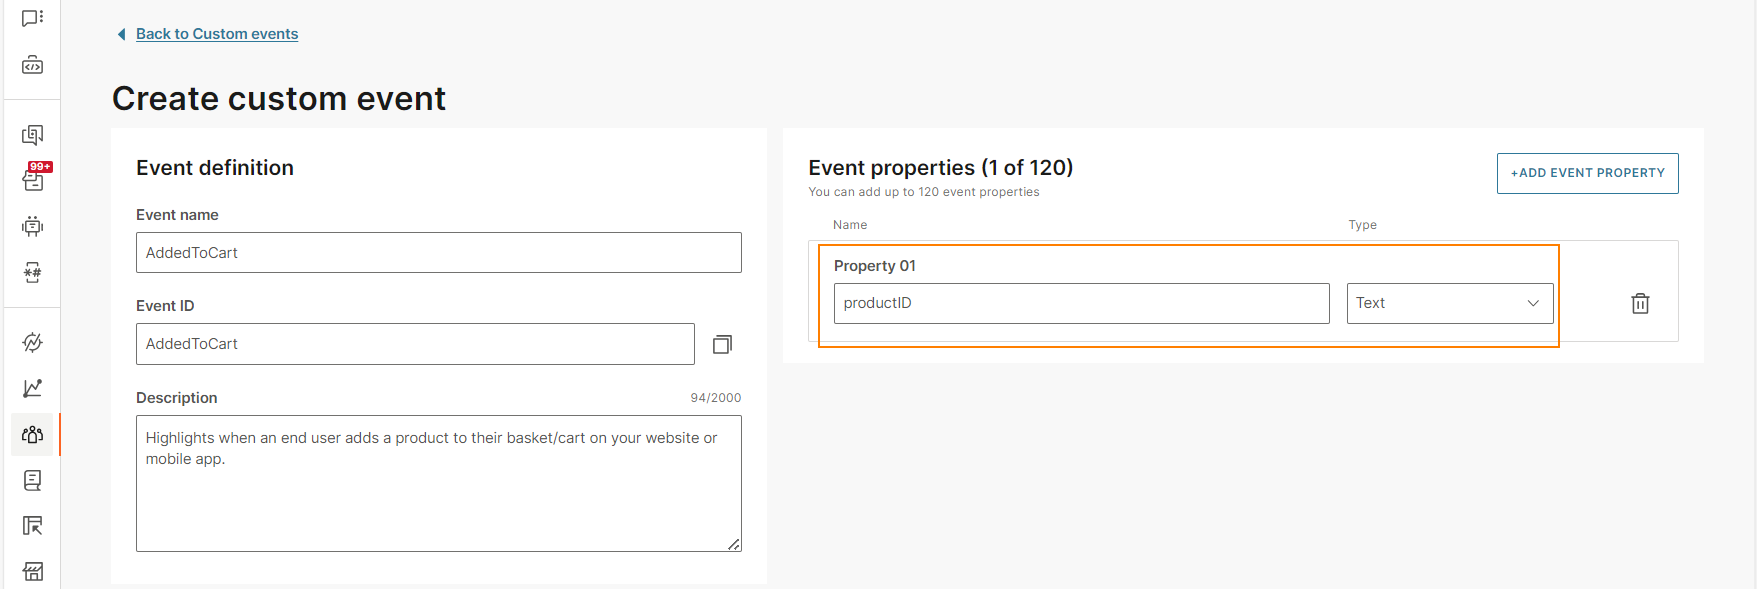
- Enter the event Property Name. Create as many properties as required. Example: To save the event of adding a product to cart, you can create properties for successful addition of the product to cart (addedCart), identifier of the product (productID), name of the product (productName), and the price of the product (productPrice).
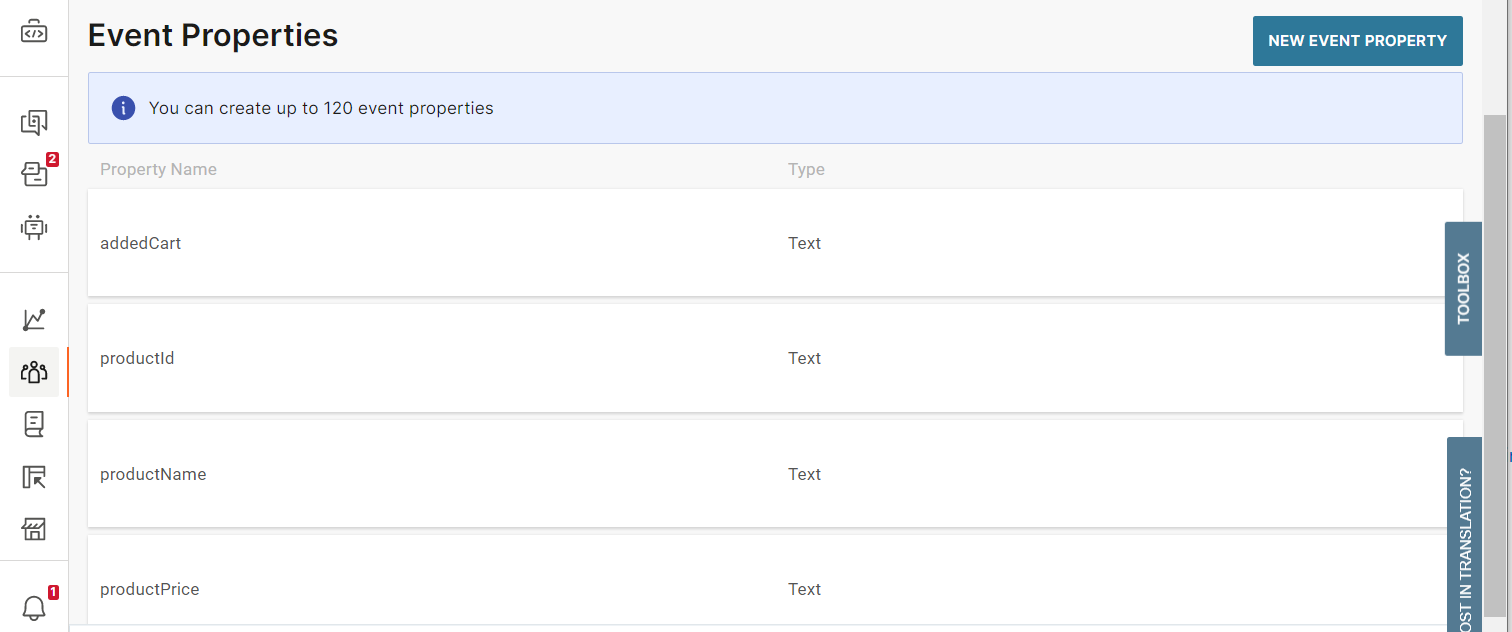
- Click Save.
Send a Custom Event to People
- Go to Answers > Chatbots and open your chatbot.
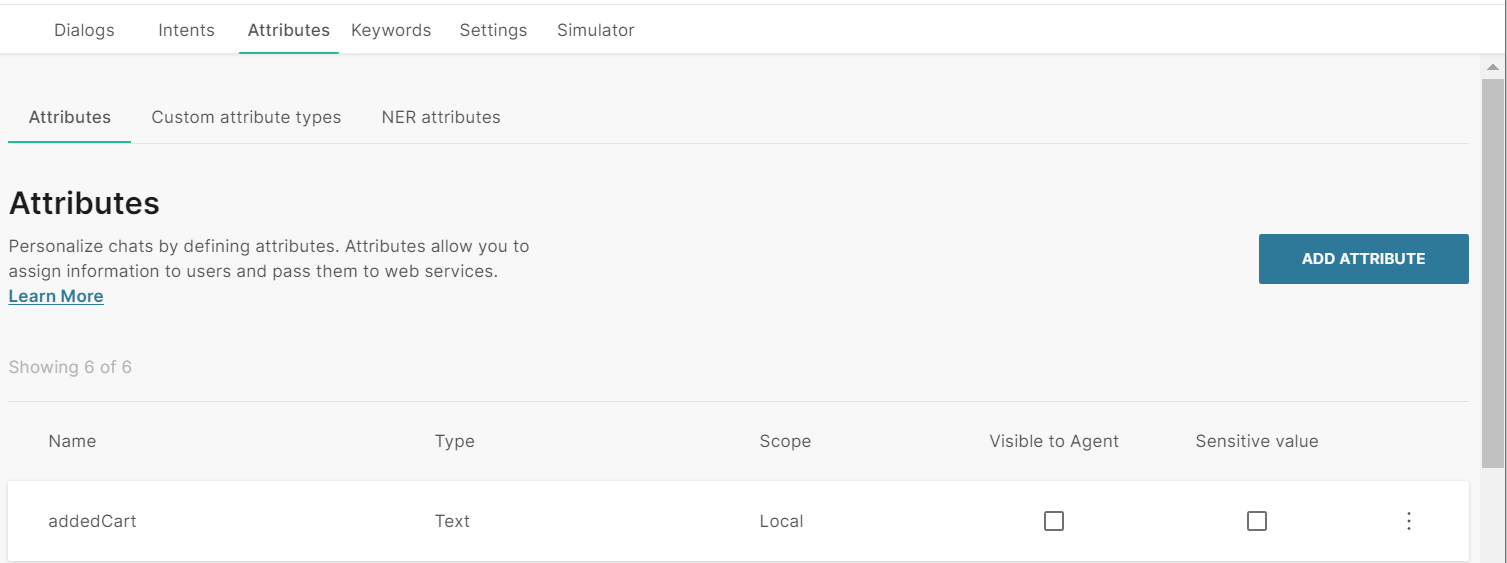
- In the Attributes tab, do the following:
- Create the attributes in which you want to save the event properties. Example: To save the event of adding a product to cart, you can create attributes for successful addition of the product to cart (addedCart), identifier of the product (productID), name of the product (productName), and the price of the product (productPrice).
For each attribute, make sure that you create equivalent event properties in People. Also, make sure that the attribute type is compatible with the event property, which you created for the event in People.
- Create an attribute to identify the Person profile. Example: customerContact.
- Create the attributes in which you want to save the event properties. Example: To save the event of adding a product to cart, you can create attributes for successful addition of the product to cart (addedCart), identifier of the product (productID), name of the product (productName), and the price of the product (productPrice).
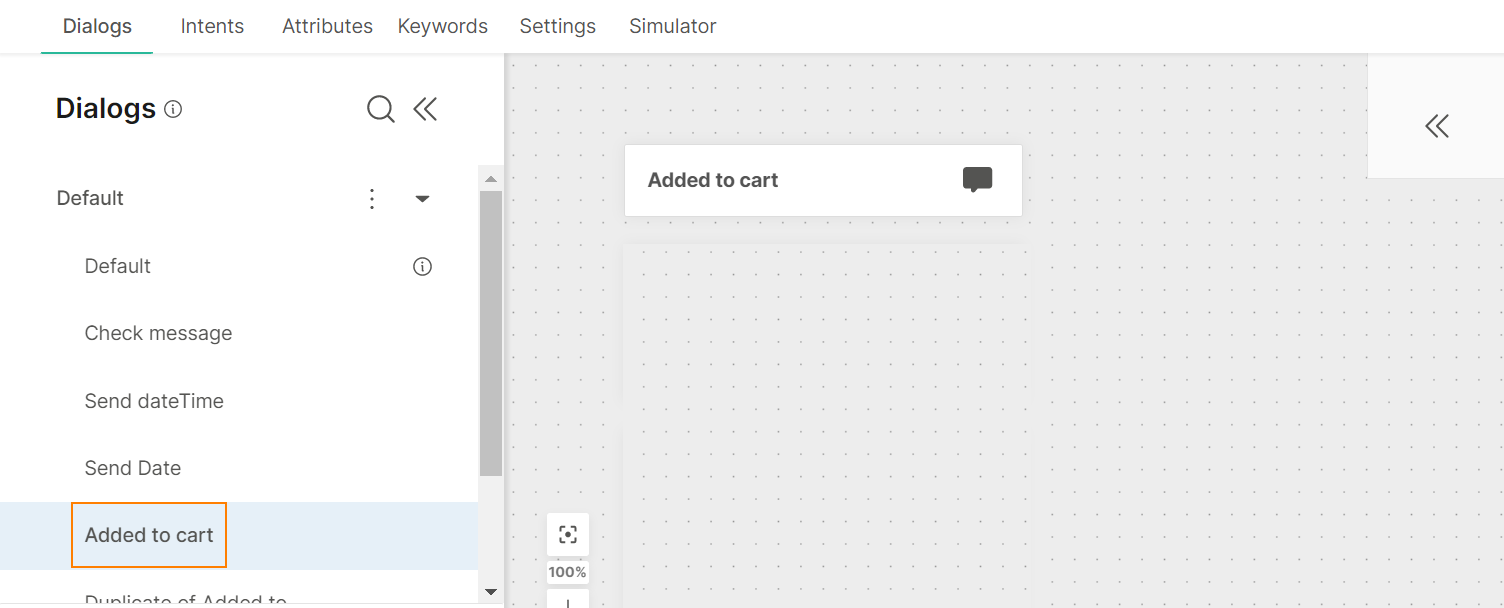
- Create a dialog to send the event from Answers to People. Example: Added to Cart.
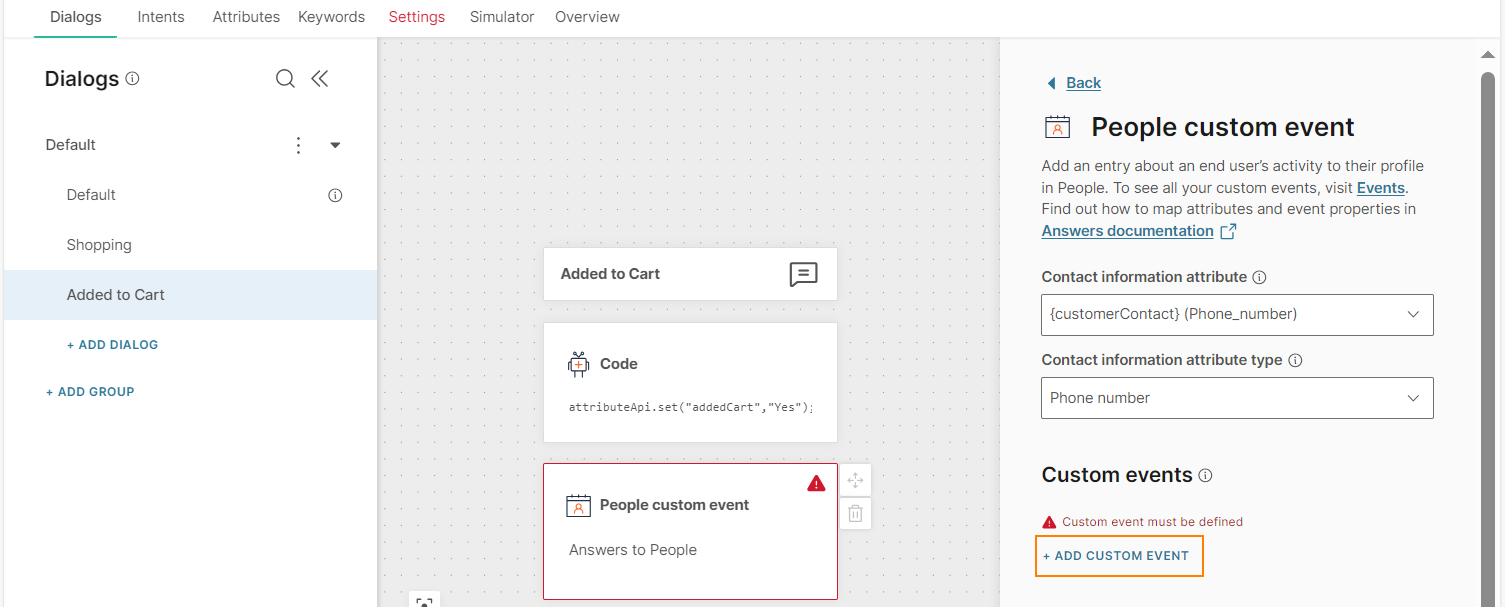
- Drag and drop the Custom event element.
- In the Custom event element, find the Person profile in which you want to save the event. Do the following:
- In the Contact information attribute field, enter the Answers attribute that contains customer contact information. Example: customerContact.
- In the Contact information attribute type field, choose the identifier of the Person profile. Example: If you want to use the end user's phone number to identify their Person profile, use the attribute type Phone number.
Answers supports the following field values when matching an Answers attribute against the Contact information attribute type field: Phone Number, Email, Internal ID, or External ID. If you want to use a different identifier in People to associate the custom event, first use the People element to get one of the supported properties from the Person profile. The People element supports retrieval from the other ID formats.

- In the Custom event configuration section, specify the event that will be saved against the Person profile. To do so, use the attribute in which the event is saved.
- Click Add custom event.
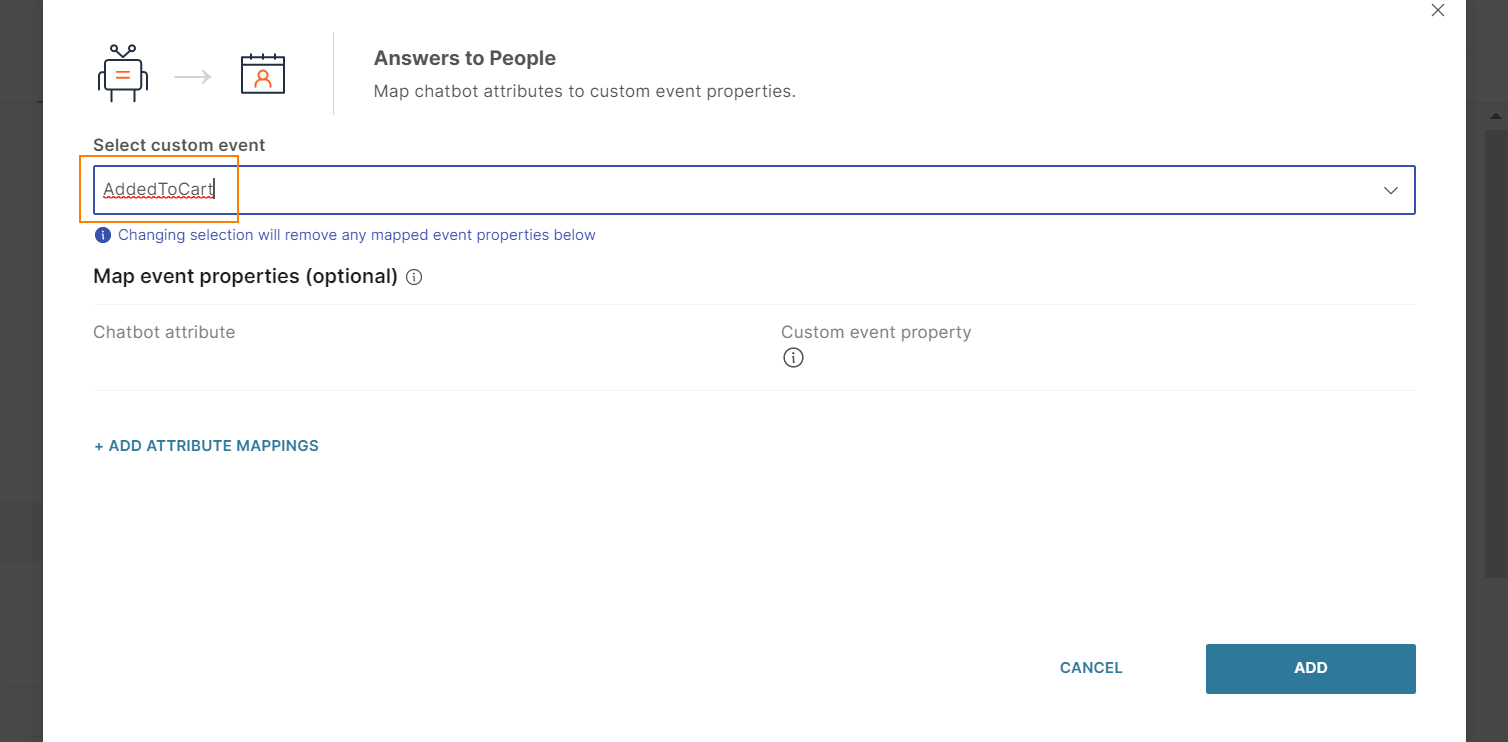
- Choose the event that you created in People. Example: AddedToCart.
- Click Add custom event.
- (Optional) Add properties to the event.
- Click Add attribute mappings.
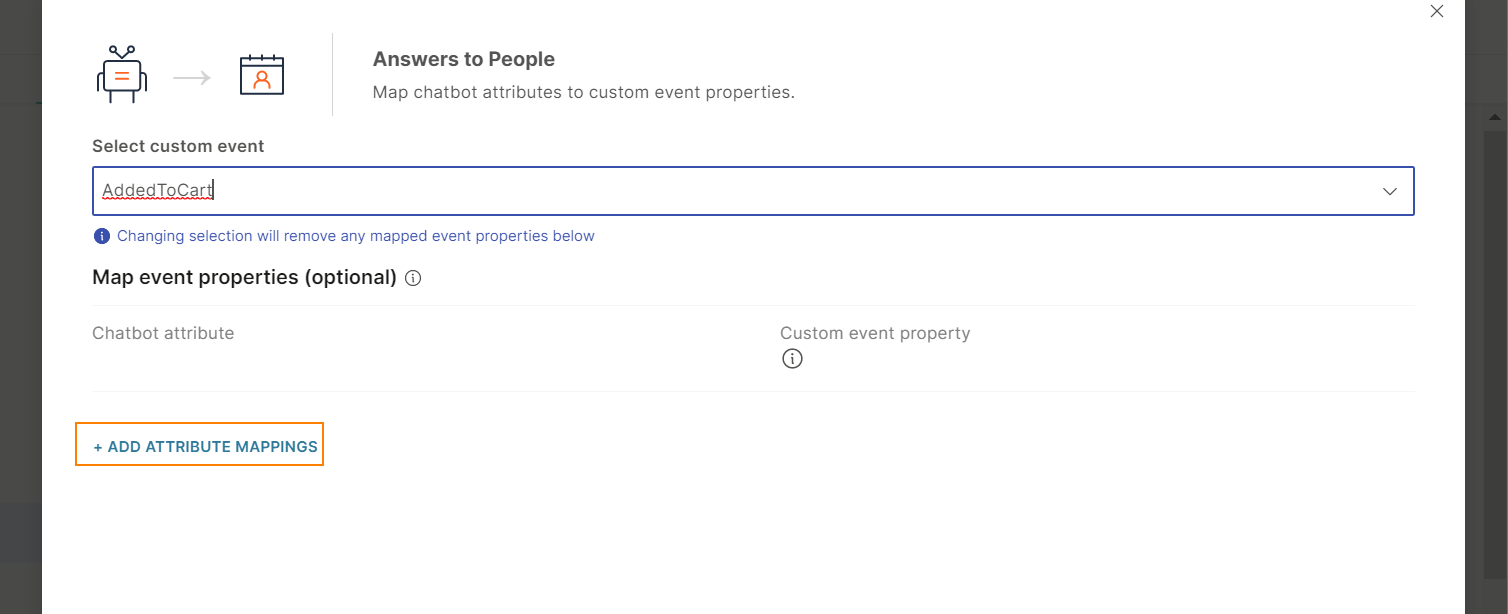
- Choose one or more Answers attributes that contains the event properties. Example: addedCart, productID, productName, and productPrice.

- For each Answers attribute, choose an equivalent event property, which you created for the event in People. Example: addedCart, productID, productName, and productPrice. Make sure that the Answers attribute type and People event property are compatible.
Answers does not support dateTime property. If you want to pass a dateTime value into an event, save the value in a Text attribute in Answers and map the attribute to a Text property type.
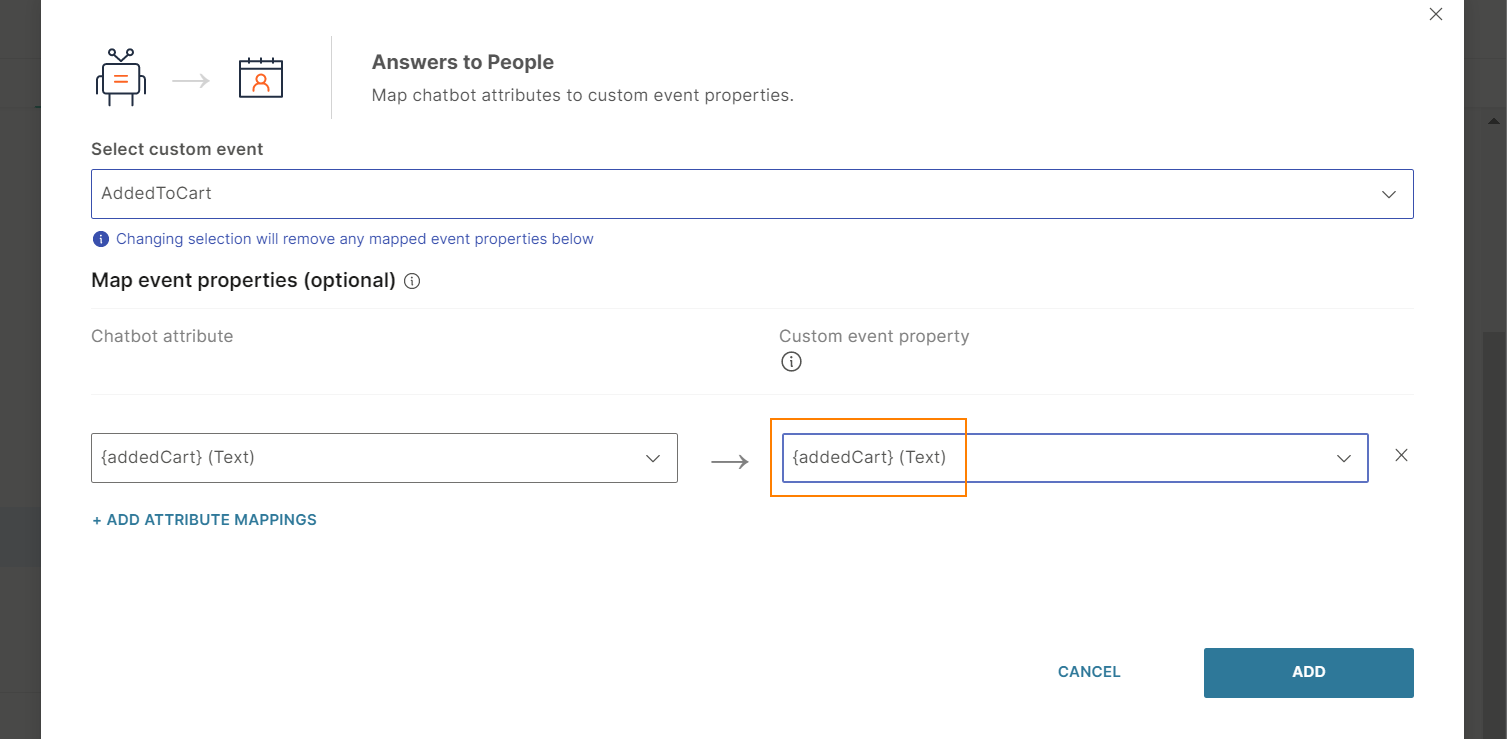
- Click Add attribute mappings.
- Click Add.
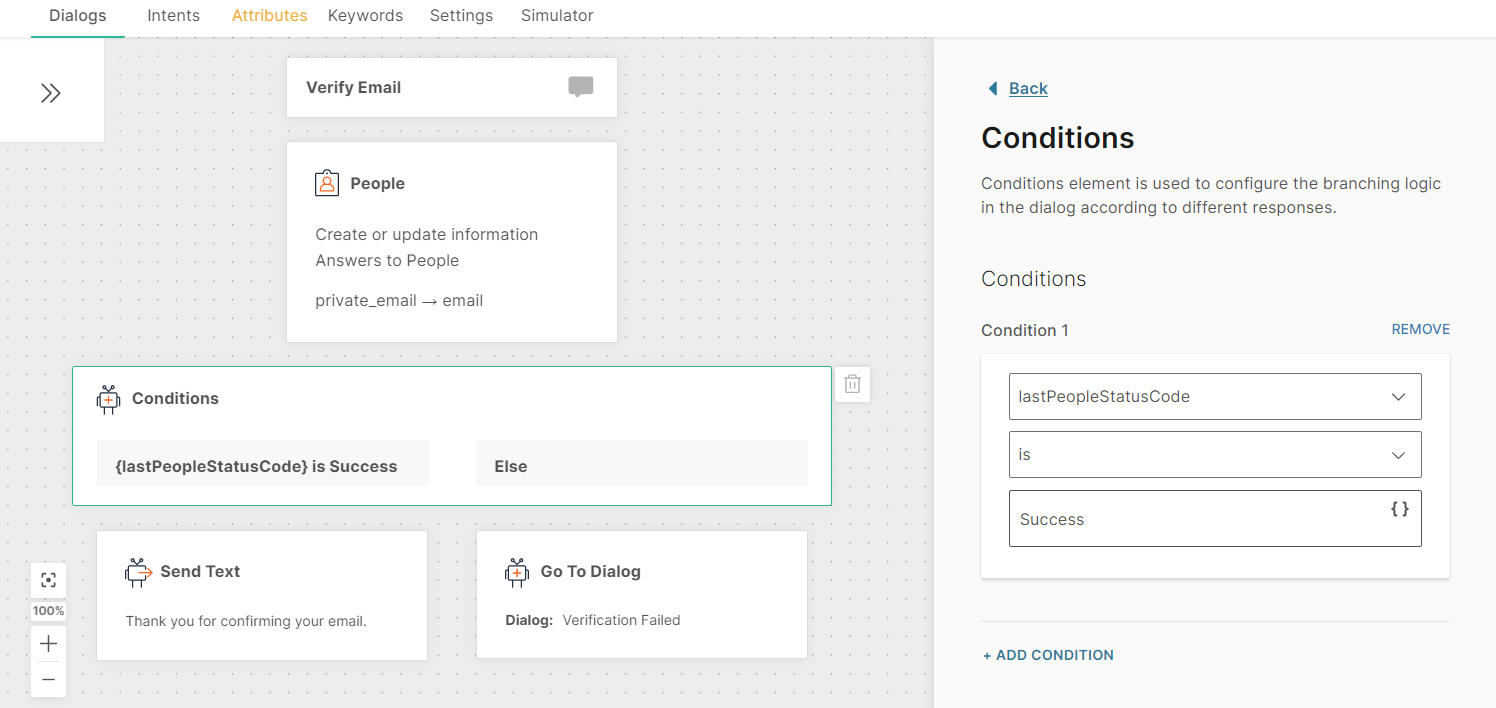
- (Optional) Check whether the event was saved successfully to the Person profile. Add a Conditions element. Configure the element as follows:
- In the attribute field, choose the fixed attribute lastPeopleStatusCode.
- Set the operator to is.
- Specify the status - Success, Fail, or Validation_Error
- Branch the chatbot flow as required.
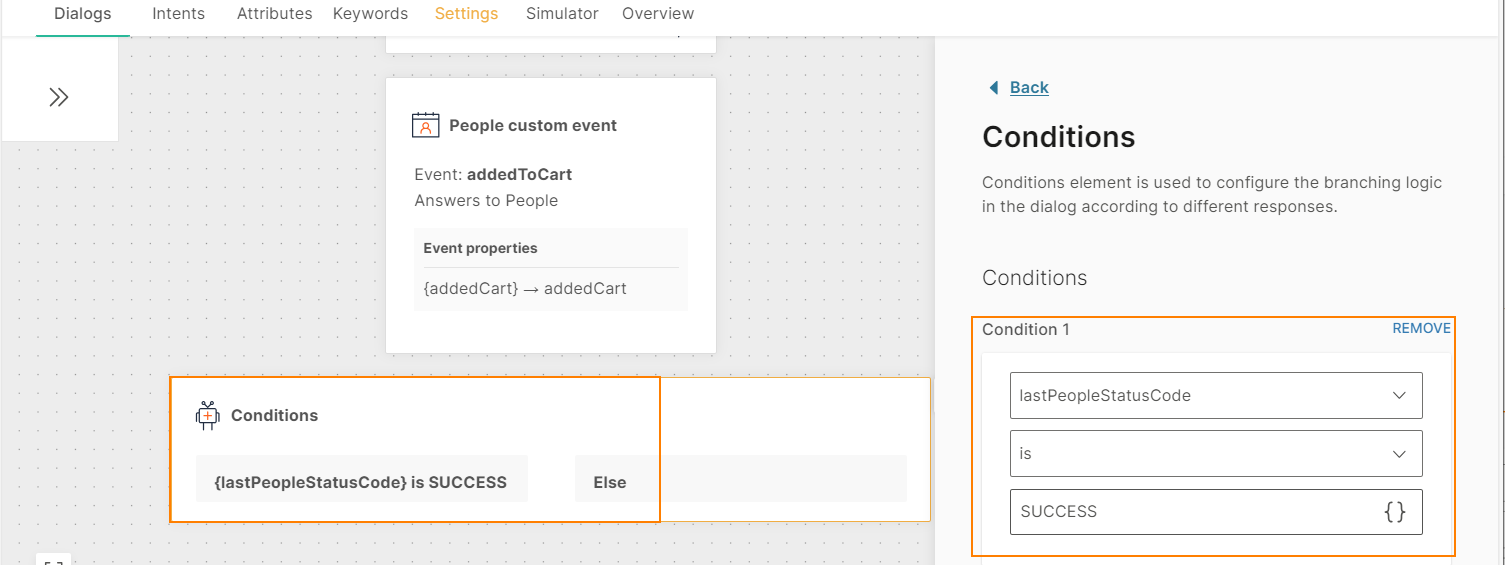
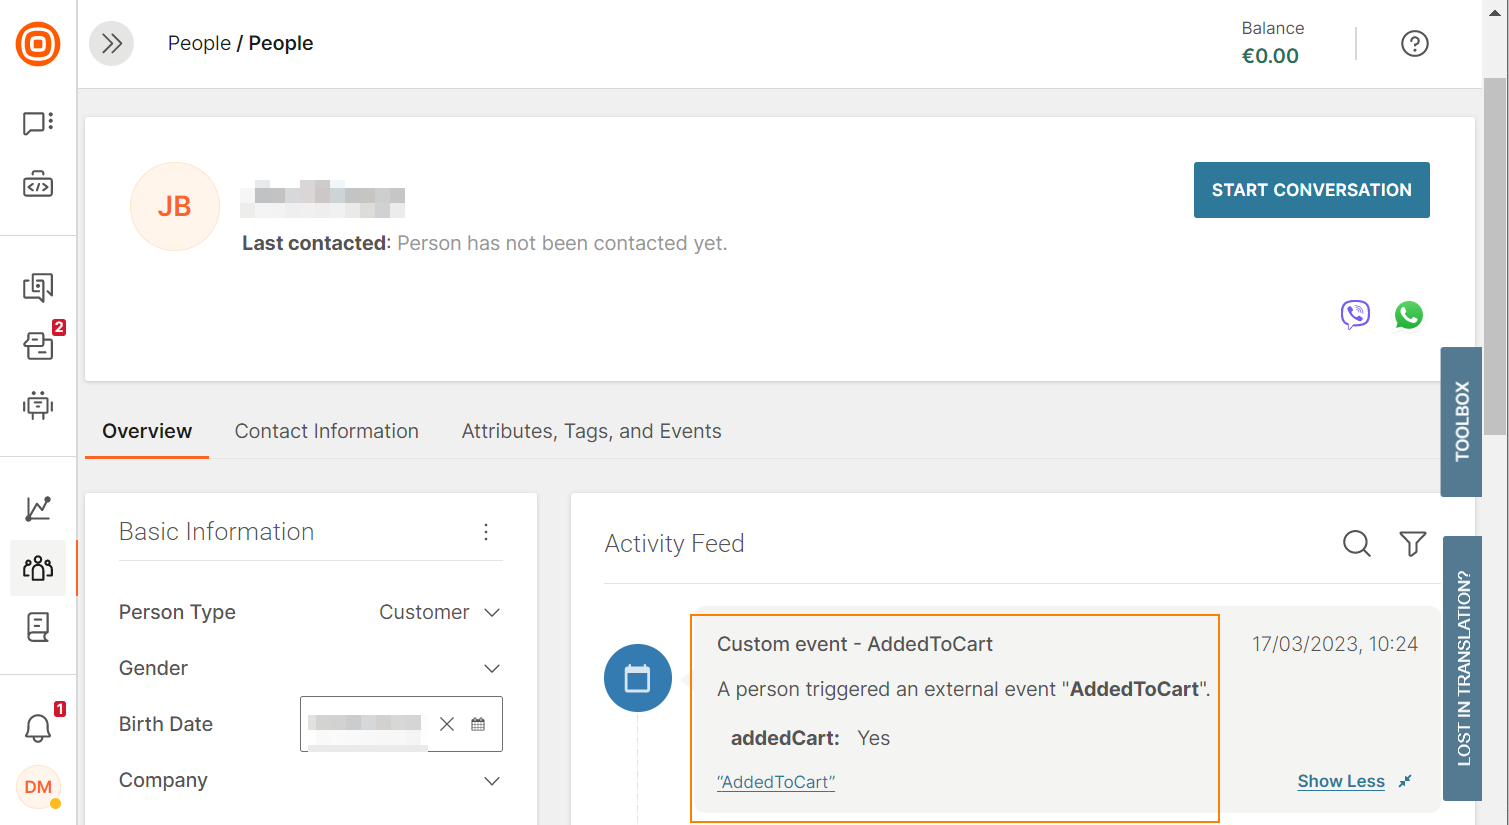
The event, along with its properties, is saved in the end user's Person profile in People.
Create a People chatbot
This section shows how to build a basic chatbot that connects with People. Follow these steps:
- In the chatbot editor, drag and drop the People element into a dialog.
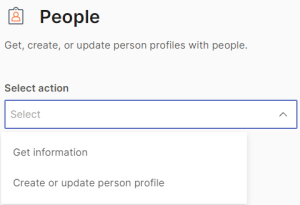
- Click the People element that you added.
- In the Select action field, specify the required action to perform. You can either get information from People or post information (create/update) to People. For this example, choose Create or update person profile.
- In the Contact information attribute field, specify the attribute that you want to use. You can either use a standard channel-specific attribute stored in People, or a custom attribute in Answers. By default, this value is set to
endUserDestination. - For custom attributes, click Add attribute mapping to map the attributes in People and Answers. Refer to the guidelines in the Attributes > Attribute Mapping section.
- Add a Conditions element. Configure the element as follows:
- In the attribute field, choose the fixed attribute lastPeopleStatusCode.
- Set the operator as required.
- Specify the status - Success, Fail, or Validation_Error.
If you use List attributes, the list values are added to the list. If you want to overwrite list values instead of adding the values to the list, use the overwrite option when you map attributes. You can overwrite the list only when creating or updating profiles.